Building Tips
Hidden costs of new construction in Santa Barbara
Homeowners looking to redevelop move quickly to hire architects and designers for the finish details. What they miss along the way are the code requirements and site conditions that drive permitting time and construction cost — zoning, hillside districts, site access, creeks division, coastal commission. A cistern is one of the best examples. It’s a concrete structure buried underground that collects rainwater from impervious surfaces to protect neighboring waterways and street drainage. The time to draw, permit, and install will impact the budget in ways most owners don’t see coming.
1. Why the Tank Exists
The City of Santa Barbara’s Storm Water Management Program and Creeks Division require new developments to capture rainwater collected from impervious surfaces — roofs, driveways, patios. Projects are categorized into four tiers based on the square footage of new or replaced impervious area:
- Tier 1 (1–499 SF) — install a basic BMP like a rain barrel or rain garden. No engineering required.
- Tier 2 (500–1,999 SF) — capture and treat runoff from a 1-inch storm event for the new area.
- Tier 3 (2,000–14,999 SF) — treat runoff from a 1-inch storm for 95% of the entire site’s impervious area.
- Tier 4 (15,000+ SF) — Tier 3 requirements plus peak discharge rate controls and volume reduction.
On hillside sites, the options narrow fast. Traditional infiltration BMPs like dry wells are often restricted to prevent soil saturation and slope instability. On slopes greater than 7%, flow spreading and disconnected downspouts aren’t allowed — the water moves too fast to be treated or absorbed. Projects near the city’s four major creeks face additional scrutiny, and setbacks from creek banks limit where capture systems can go.
The result: on a Tier 3 or 4 hillside project, the compliance path almost always leads to a concrete cistern — an engineered underground tank connected to the property’s irrigation system for reuse. A licensed civil engineer designs the system, the city approves it, and now it’s on the builder to execute.
If your project sits right on the edge of a tier — say 510 square feet of new hardscape — reducing by just 11 square feet drops you to Tier 1 and eliminates the engineering cost for Tier 2 volume calculations. Worth checking before plans are finalized.
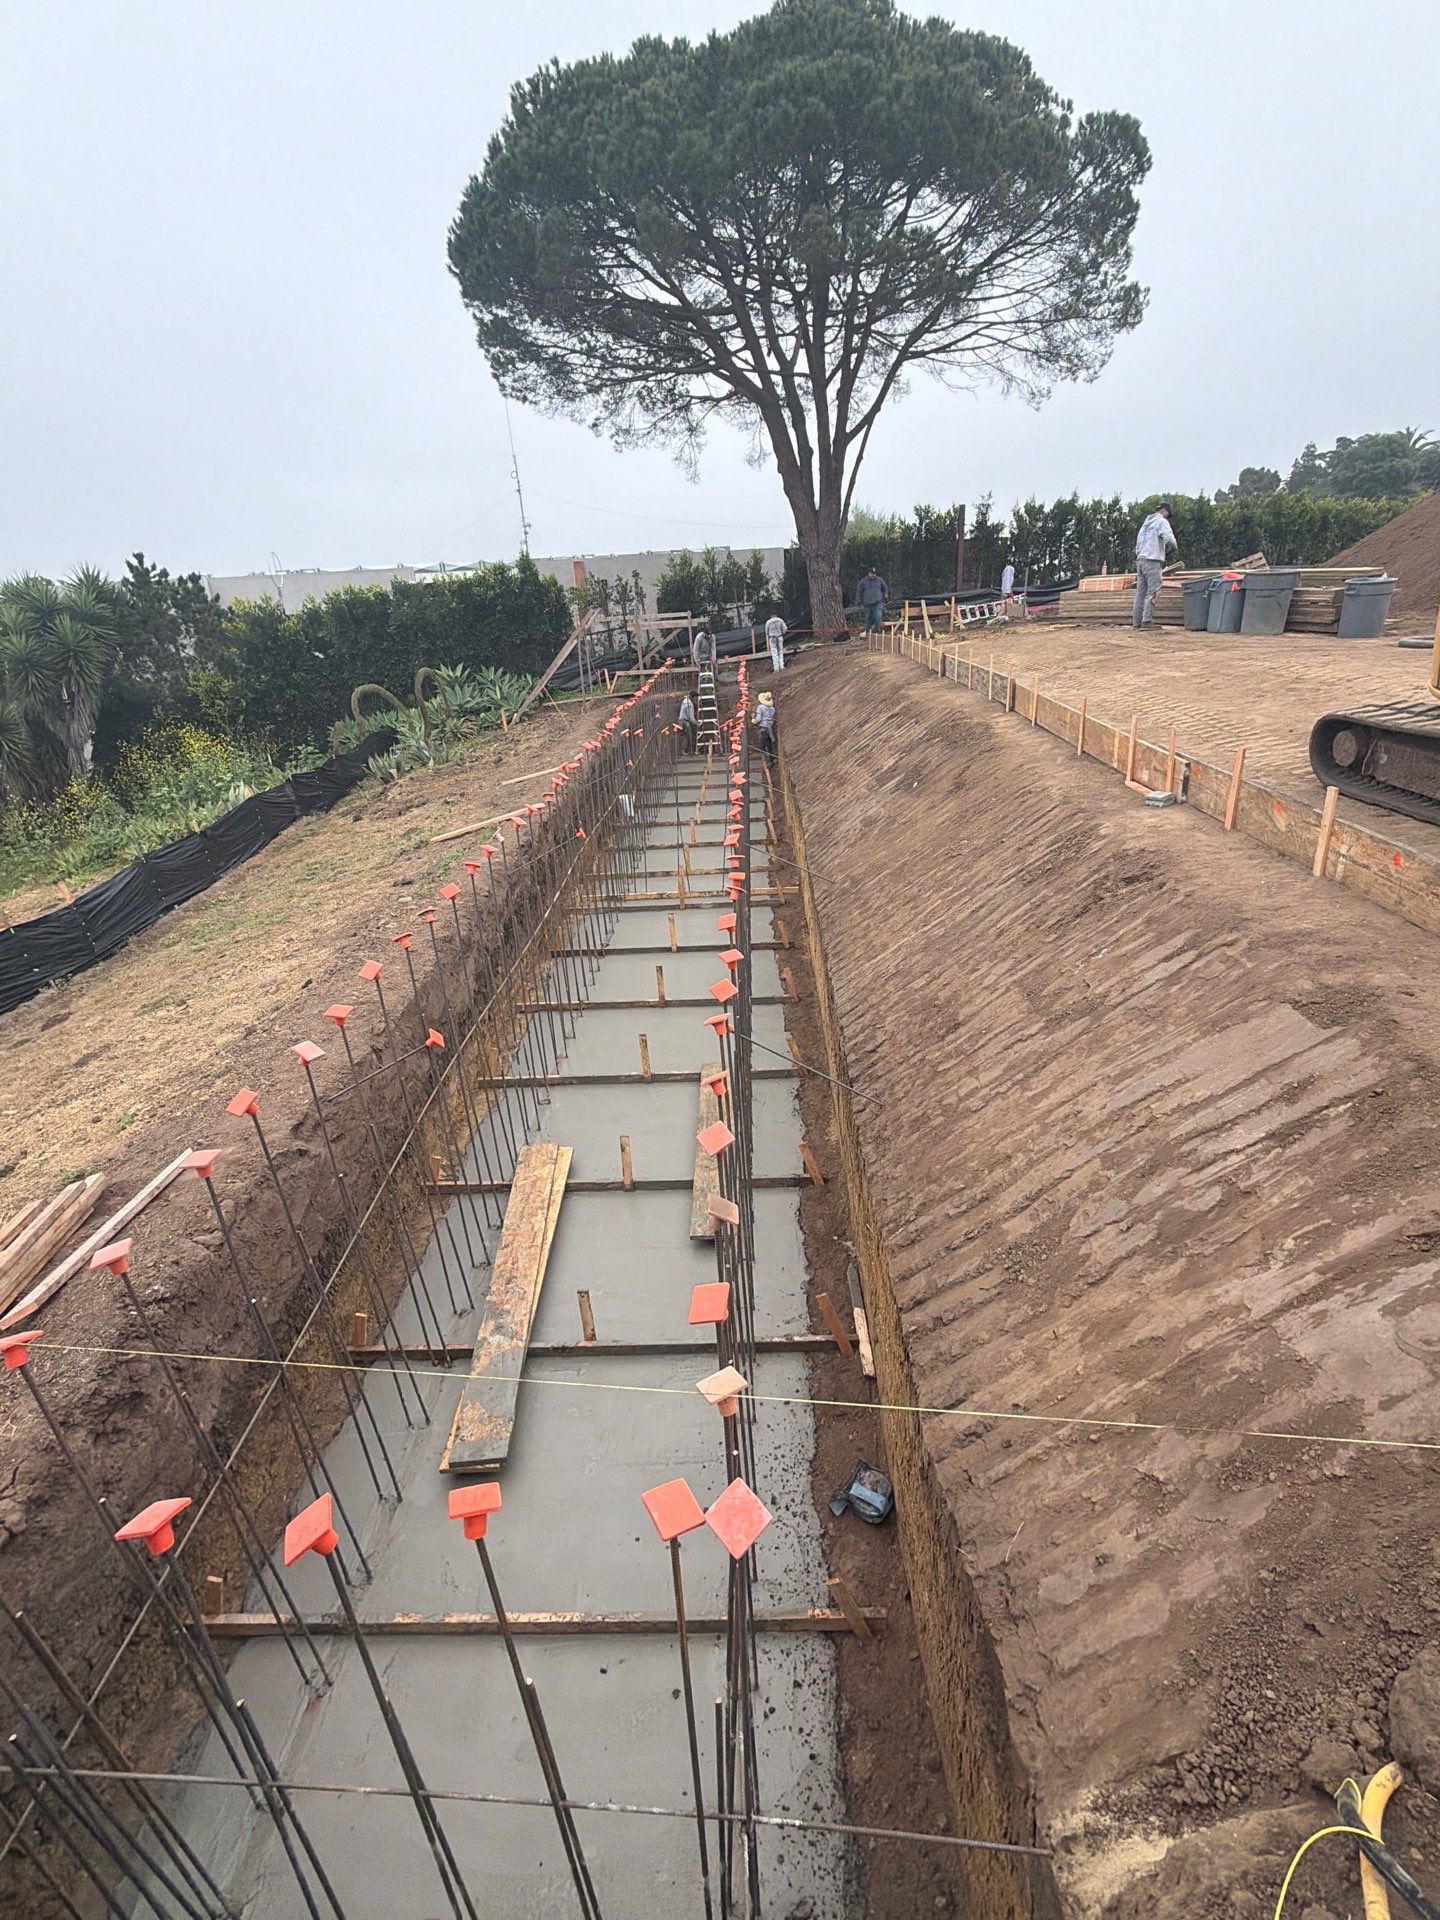
2. Excavation and Footing
Once we establish string lines and chalk lines based on finish height elevations — cross-checking the build specs and plan details — we can excavate for the concrete slab. The cistern is a concrete box: a slab foundation to land four walls and a roof on.
The footing has a detail for size — width, length, thickness — and then we account for depth of the cut as it relates to the hillside next to it. Any cut depth over 5 feet gets sloped at a 1:1 ratio for stability. We cut outside the footprint of the footing 2 feet on either side to give working room for forms, rebar, waterproofing, and drainage.
Once excavation is complete, we install rebar and forms for the foundation and get it approved by the civil engineer, Pacific Materials Lab (soils engineer), and the QSP from the City of Santa Barbara. On pour day, PML comes back to take samples and cross-check the materials delivered against the plans. They monitor the pour for accuracy and level of execution.
The cycle from here is repetitive: dig, form and rebar, inspection, pour, strip forms, waterproof the keyway, more rebar, more forms, more inspections, more concrete — and repeat one more time for the lid.
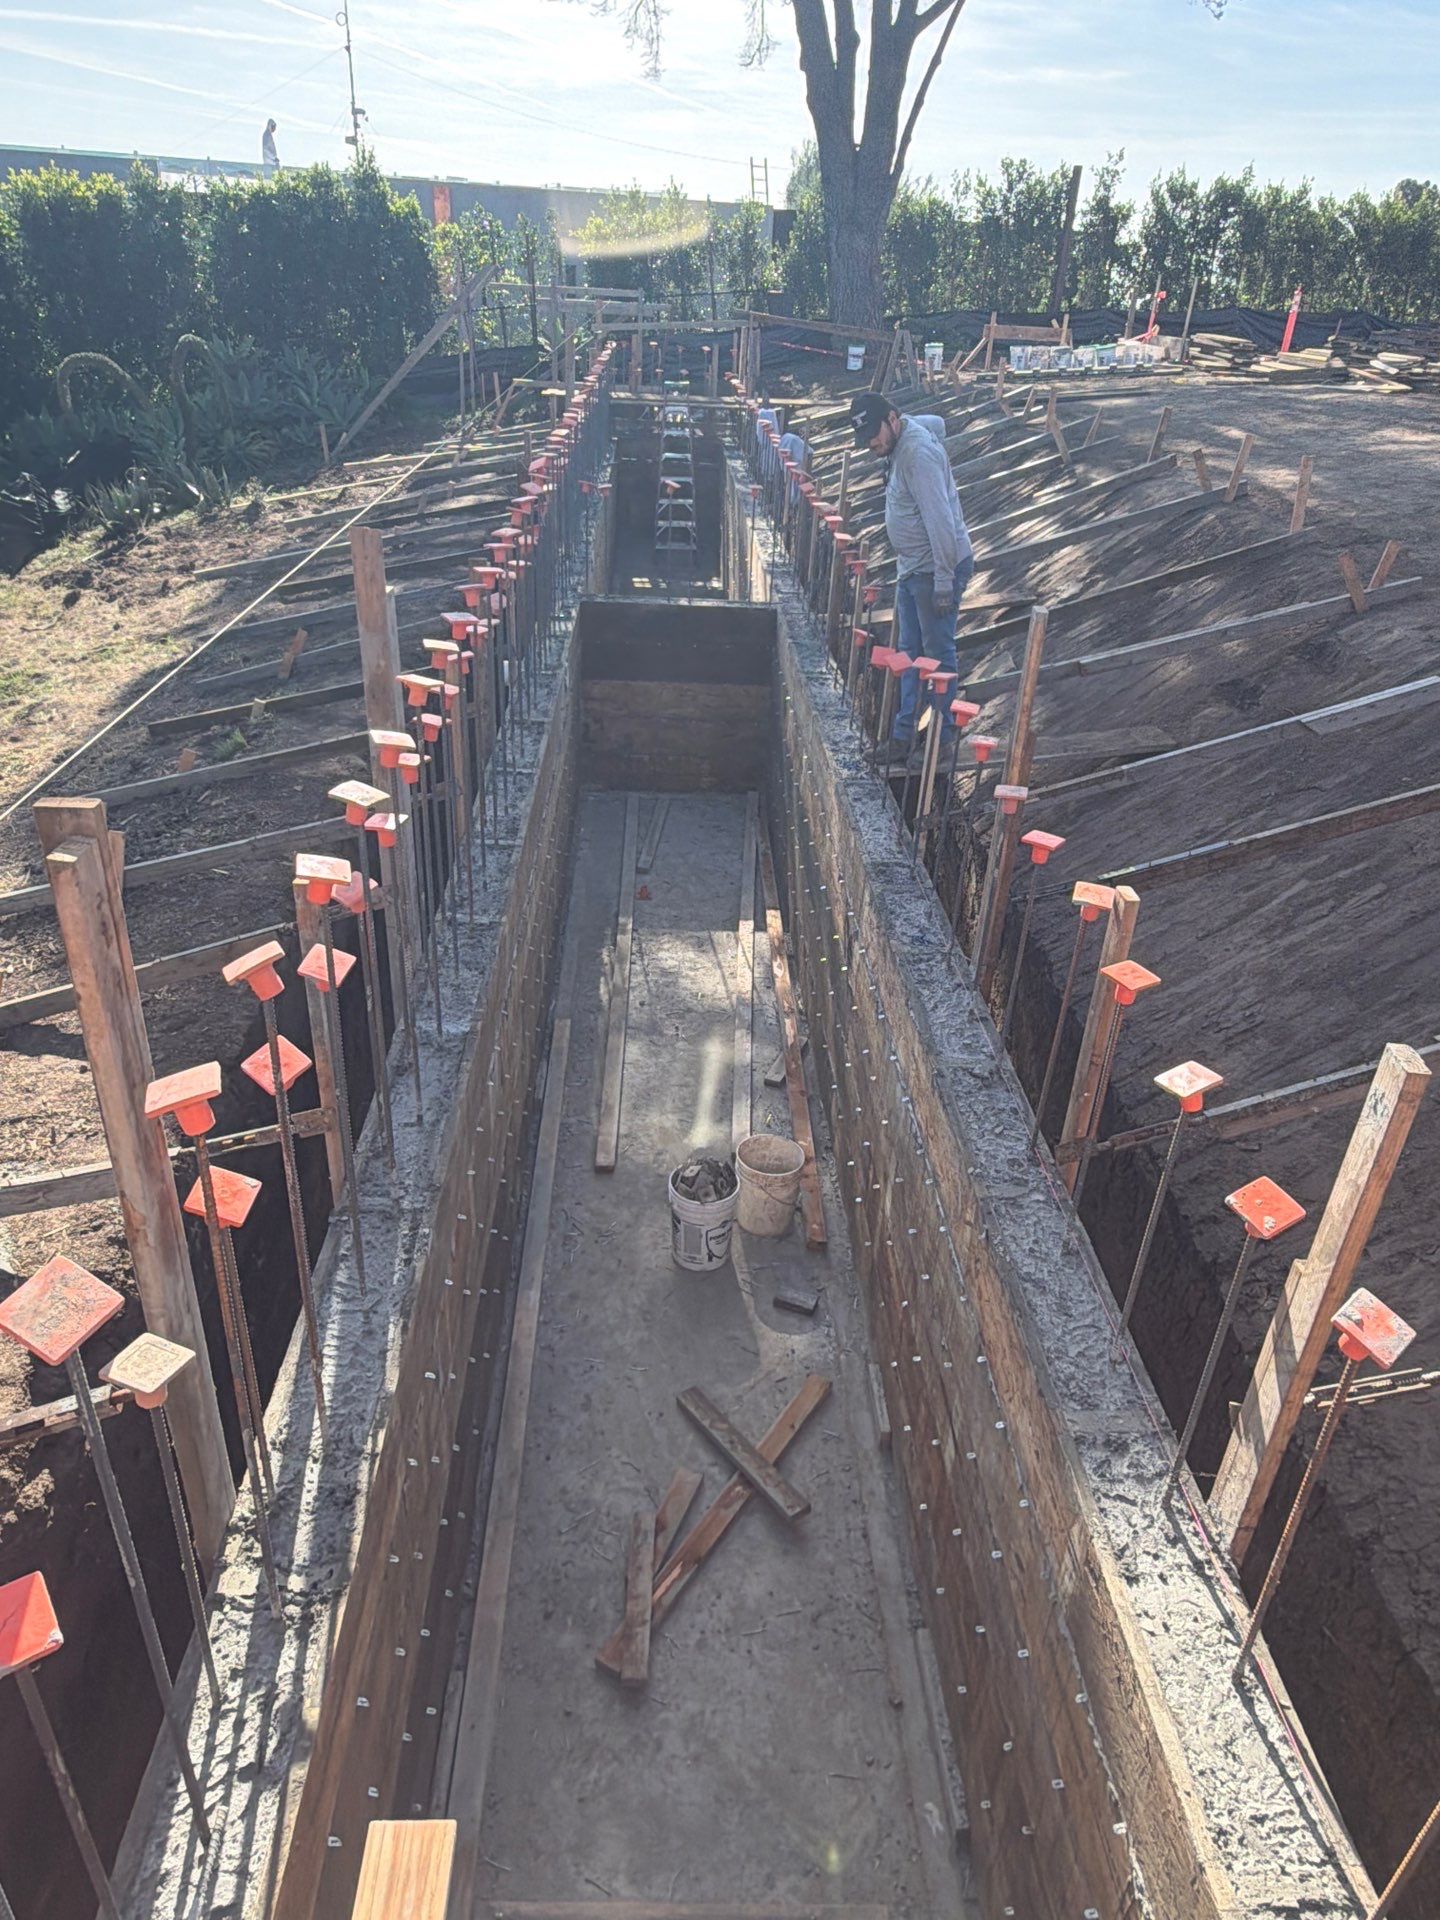
3. The Foundation Pour
The concrete has to get from the supplier to the location of the pour — and that chain has multiple links. From the truck to the hopper, from the hopper to the boom, and from the end of the boom into the forms with a controlled process for managing outflow. Finishers on site screed and trowel the concrete as it goes in. When done right, a concrete team has 1-2 members at each step in the chain repeating the same task as trucks move in and out of the site, pouring roughly 9 yards per truck.
On a hillside, the boom pump gets tied to the excavator bucket so a machine operator can direct the flow of concrete without anyone standing at the edge of the excavation. A pneumatic vibrator follows behind the pour to work the concrete around the rebar evenly and eliminate air pockets. PML is on site to observe the pour, cross-check the mix delivered against the plans, and take samples for 7-day strength testing.
45 minutes after the pour, stakes and 2x4s are pulled while the concrete is still workable. The surface gets hand troweled — finishing around rebar, keyways, and anywhere dirt fell into the excavation. Trucks get washed out before exiting the site. The foundation cures over the weekend and the cycle starts again on Monday: strip the keyways, set wall forms, tie rebar.
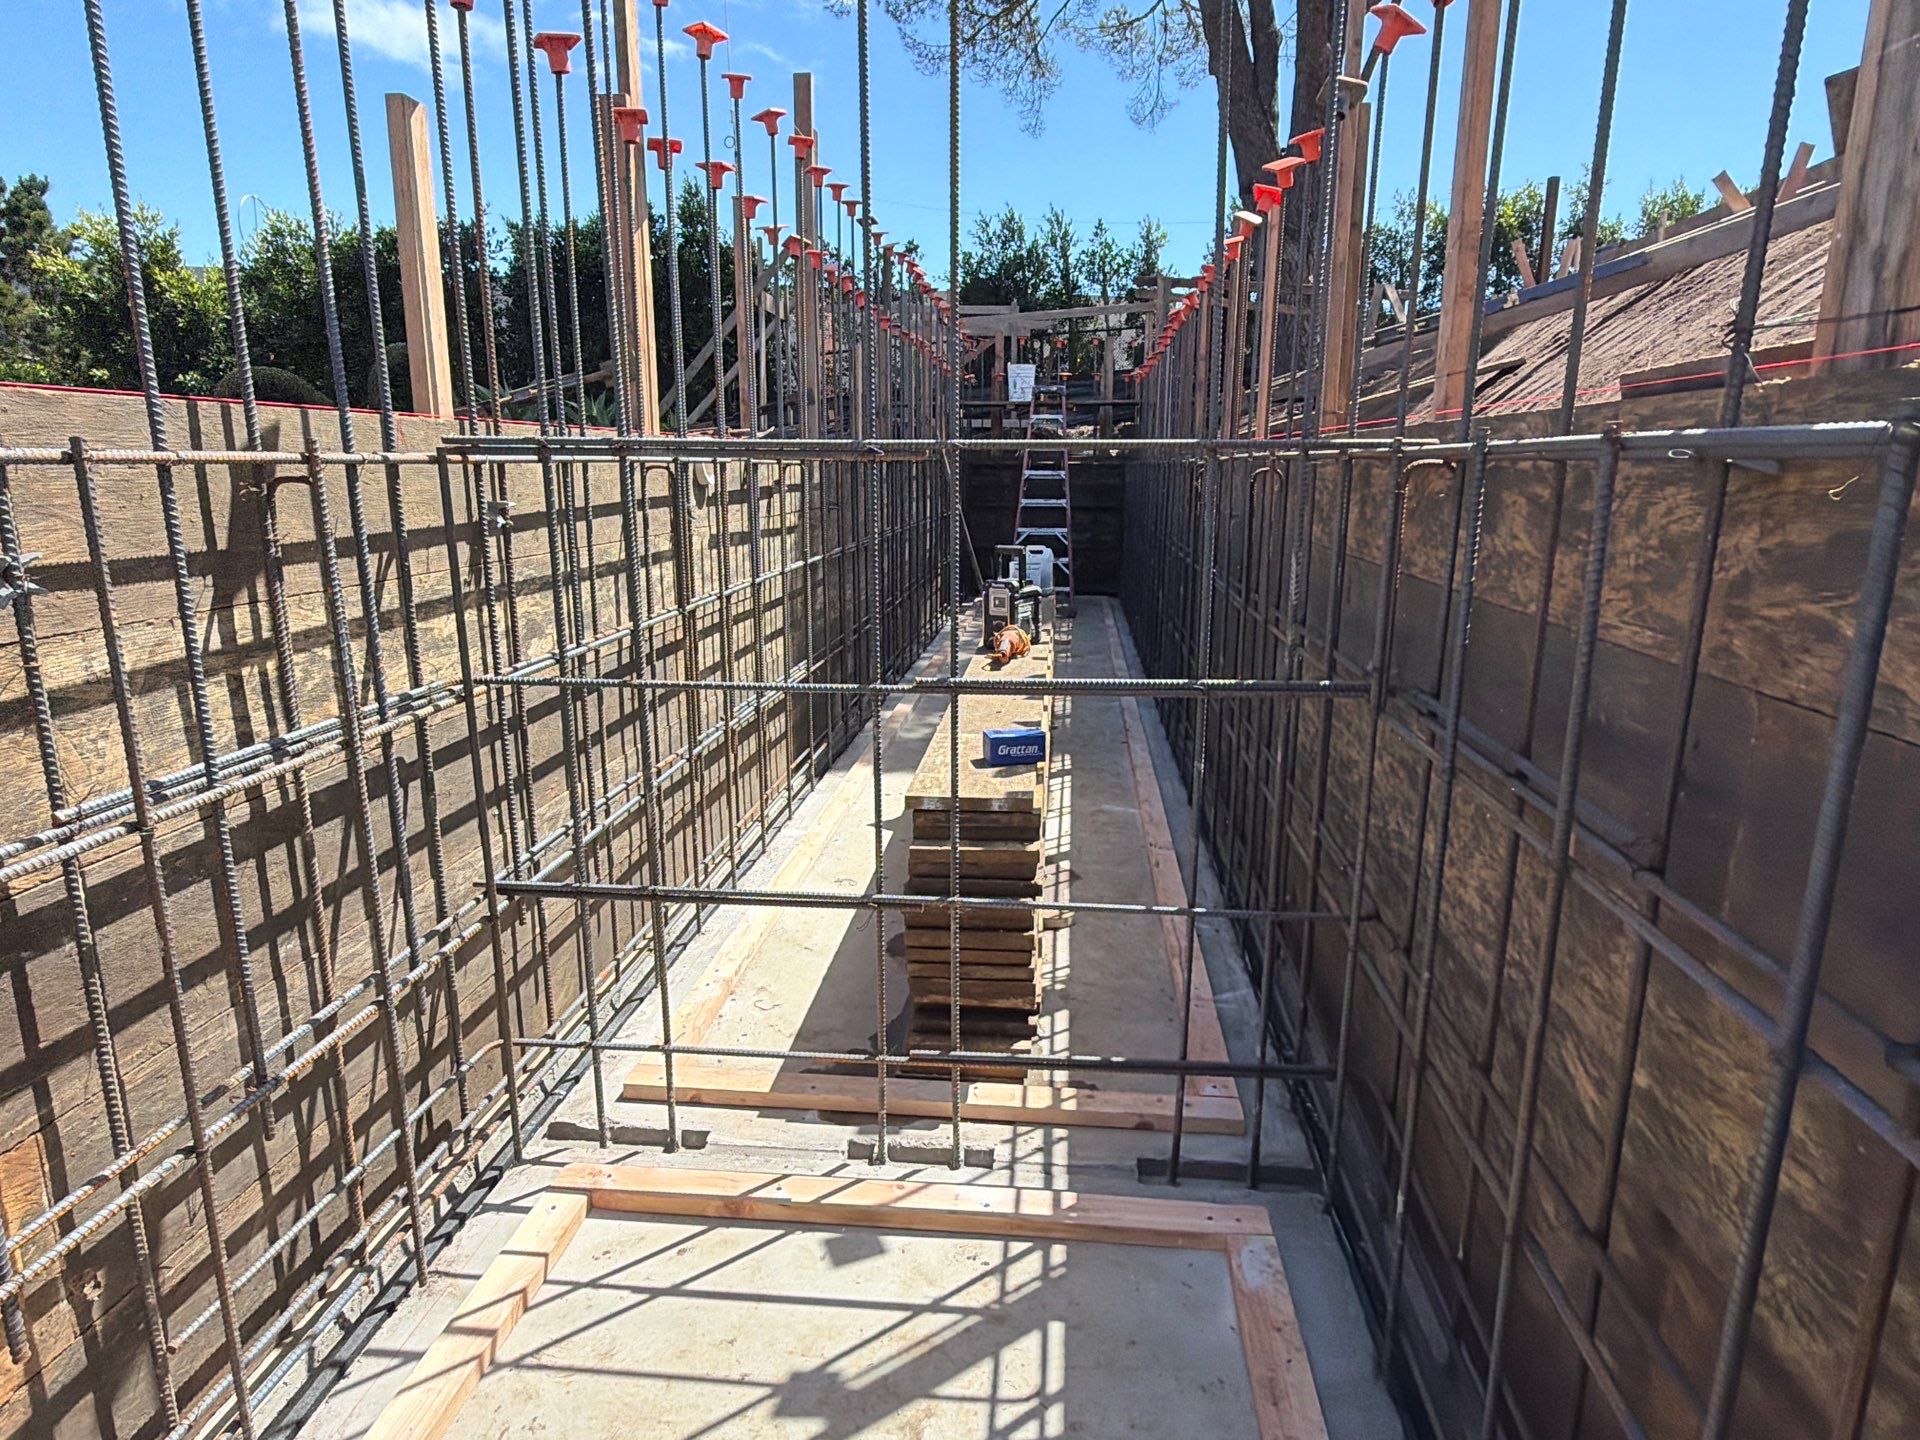
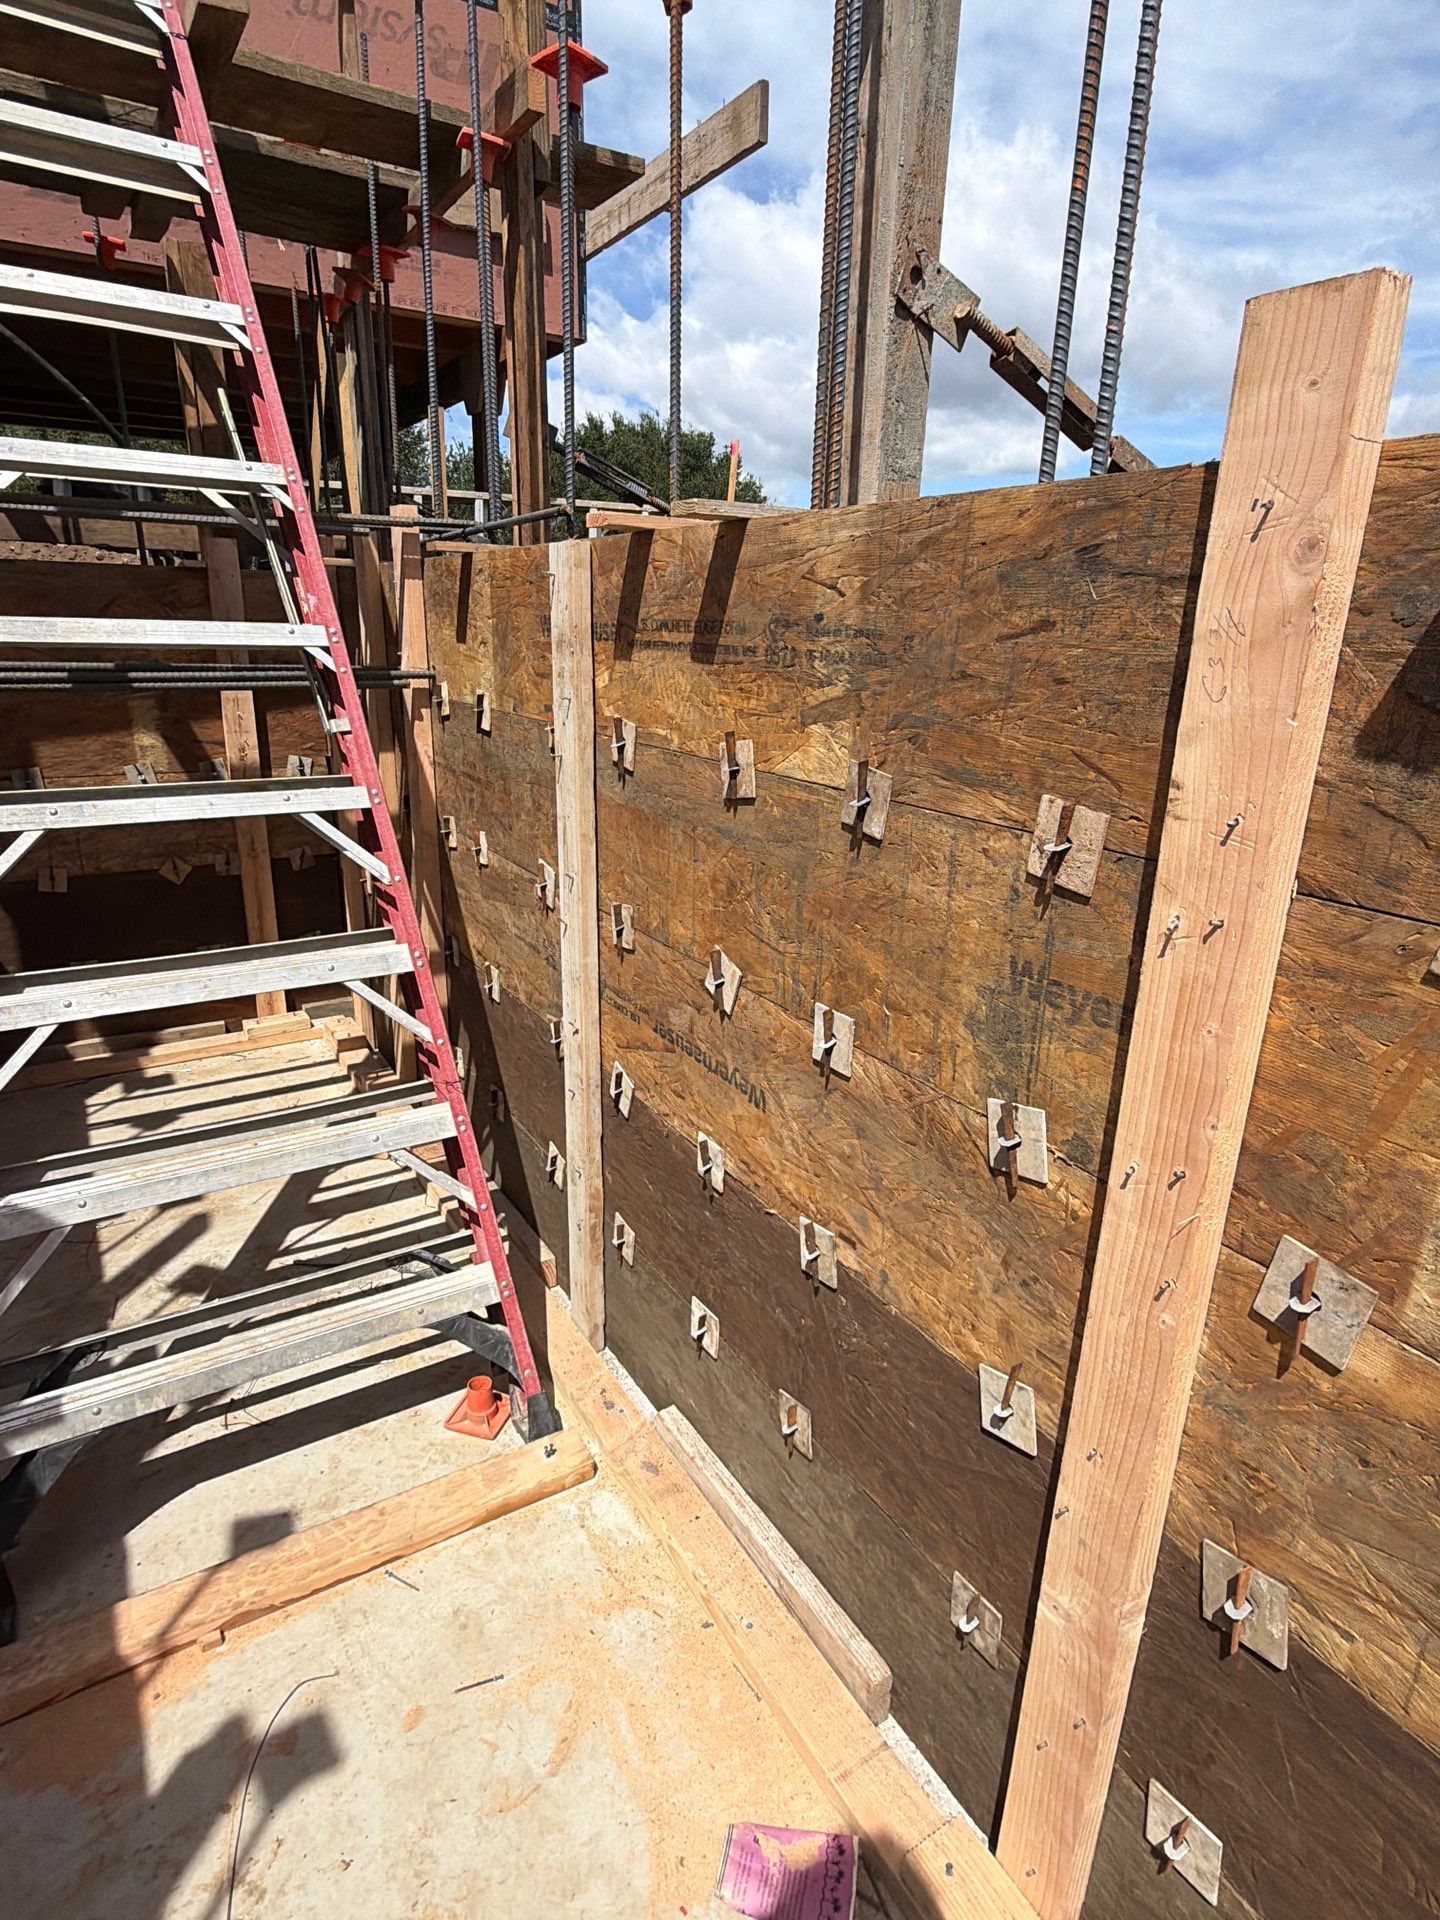
4. Formwork and Walls
Chalk lines mark the inside face and outside face of the wall as it relates to the existing rebar. A string line is set for the outside edge of the cleat. From there, the assembly builds out in layers: the cleat attaches to the concrete foundation, the strong back attaches to the cleat, and the form boards attach to the strong backs. Strong backs are cross-braced with 2x4s, stakes, and turnbuckles. The outside face has strong backs; the inside face has vertical 2x4s tied into the cleat and attached to the form board. Anchor plates and wedges hold everything together.
All of this is done to ensure the concrete pour is supported and we don’t risk a blowout — a form board breaks open and concrete pours out everywhere.

Before the wall pour, drainage gets built into the forms. 6-inch overflow drains are set at the top of the wall, held in place with temporary nails. A 3-inch release valve is installed at the base of the tank — connected to a manual valve so the tank can be drained and serviced. A baffle at the center of the tank divides the interior into two chambers.
5. Waterproofing
The keyway is where the wall meets the footing — a cold joint between two separate pours. Bentonite clay is installed at this joint before the wall pour. When water contacts the clay, it expands up to 15 times its dry volume, sealing the joint so water cannot pass through.
After the concrete installation is complete, the outside and inside face of the wall where the joint meets get additional waterproofing applied over top. The interior receives three coats of sealer, two coats of cementitious membrane, and reinforcement fabric — all applied to the walls, floor, and underside of the lid. Pipe penetrations are sealed individually.
6. What’s Left
Grade beams are set to support the ends of the concrete lid where the manhole is framed out. The bottom of the slab is formed like framing the floor of a house — ledgers, joists, and plywood on top. Holes are drilled for water inlets, conduit for pump power, and an irrigation line outlet. Then rebar is tied, inspected, forms are finished, and concrete is poured again.
The final curing process takes 28 days before we remove all forms. Then we waterproof, add drainage, backfill the tank, and install the pump. All of this work ends up hidden underground with nothing more than a few manhole covers in the backyard.
Key Takeaways
- A water collection system can catch an owner off guard when investigating a property to purchase — having an experienced GC involved during pre-construction helps identify these requirements early
- An experienced team expedites the permitting process, pulls together a working budget, and value engineers the drawings and finish details
- The goal is to ensure the finished product is what the owner wants without spending part of the investment on a hidden cost that impacts finish material selections or derails the project halfway through
- The cistern alone requires multiple pours, multiple inspections, and multiple trades coordinating over weeks — all before house framing starts
- Knowing the tier requirements, site conditions, and compliance path up front helps manage expectations during the build process